Rで解析:ワッフル図が簡単です「baffle」パッケージ
ワッフル図を簡単に作成できるパッケージの紹介です。シンボルをテキストに変換しプロットできます。
パッケージバージョンは0.2.1。実行コマンドはwindows 11のR version 4.2.1で確認しています。
<おすすめのRに関する書籍です>

言葉と数式で理解する多変量解析入門 | 小杉 考司
Amazonで小杉 考司の言葉と数式で理解する多変量解析入門。アマゾンならポイント還元本が多数。小杉 考司作品ほか、お急ぎ便対象商品は当日お届けも可能。
パッケージのインストール
下記コマンドを実行してください。
#パッケージのインストール
install.packages("baffle")
スポンサーリンク
実行コマンドの紹介
詳細はコマンド、各パッケージのヘルプを確認してください。
#パッケージの読み込み
library("baffle")
###データ例の作成#####
set.seed(1234)
TestData <- table(sample(LETTERS[1:3], 50, replace = TRUE))
########
#ワッフルプロットの作成:waffleコマンド
#列方向のプロット数を指定:nrowオプション
#行方向のプロット数を指定:ncolオプション
#プロット列行向きを指定:byrowオプション
#プロット開始位置を指定:fromオプション;
#"bottomleft","bottomright","topleft","topright"が可能
#シンボルの設定:fオプション;square,circle,rcpolyが可能
#シンボルの積み上げ設定:stackedオプション
#rcpoly設定時の頂点数を指定:nオプション
#塗色の指定:colオプション
waffle(TestData,
nrow = 6, ncol = NULL,
byrow = FALSE, from = "bottomleft",
stacked = FALSE, gap = 1,
f = rcpoly, n = c(3, 6, 5),
col = palette.colors(3, "Set 2"))
#凡例の追加:graphics::legendを使う
legend(x = "top", horiz = TRUE, border = NA,
inset = 1, xpd = TRUE, bty = "n",
legend = names(TestData), cex = 1.3,
fill = palette.colors(3, "Set 2"),
title = "タイトルテスト")
###文字でワッフルプロット#####
#下記オフィシャルサイトから引用
#https://j-moravec.github.io/baffle/articles/baffle.html#text-and-points
#文字サイズとテキスト内容を計算する
autotext <- function(x, y, labels, d=0.9, ...){
cex = min(1/strheight(labels), 1/strwidth(labels))*d
text(x, y, labels, cex=cex, ...)
}
#waffleコマンドに適応
#fオプションにautotextを適応
#labelsオプションに文字列を指定
waffle(TestData,
nrow = 6, ncol = NULL,
byrow = FALSE, from = "bottomleft",
stacked = FALSE, gap = 1,
f = autotext, labels = names(TestData),
col = palette.colors(3, "Set 2"))
#凡例の追加:graphics::legendを使う
legend(x = "top", horiz = TRUE, border = NA,
inset = 1, xpd = TRUE, bty = "n",
legend = names(TestData), cex = 1.3,
fill = palette.colors(3, "Set 2"),
title = "タイトルテスト")
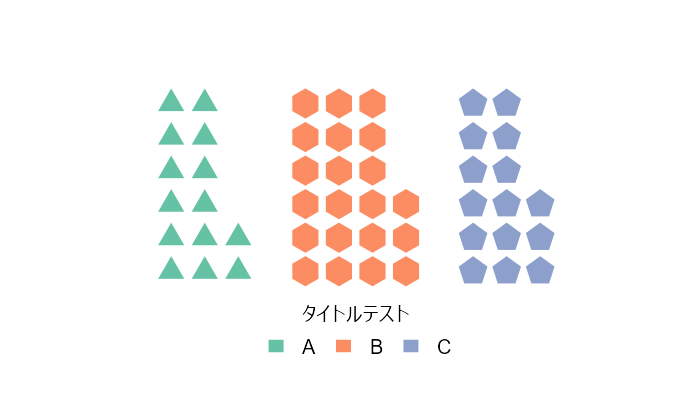
########出力例
・waffleコマンド
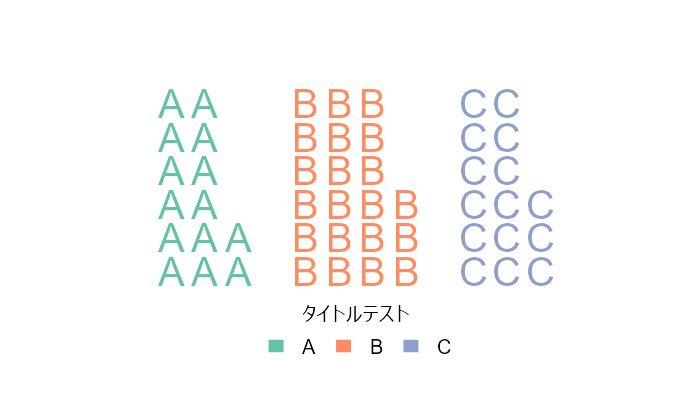
・文字でワッフルプロット
少しでも、あなたの解析が楽になりますように!!

スポンサーリンク